

4
添加AFE和DSAD
本节学习如何添加外围功能-AFE和DSAD,并进行设置,每1ms采集外部PT100的温度值。
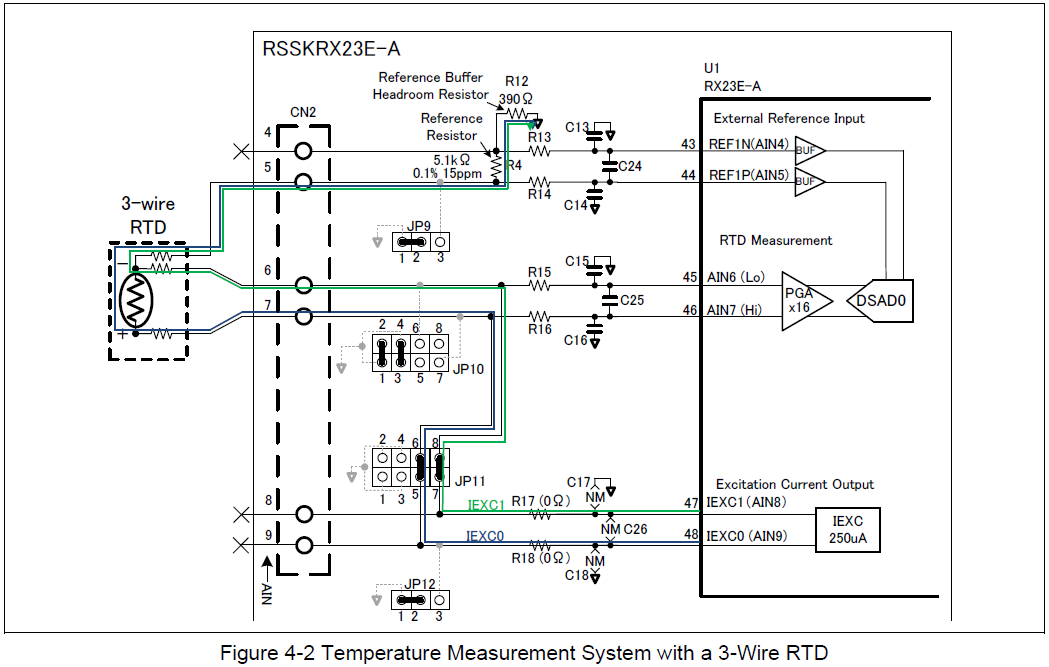
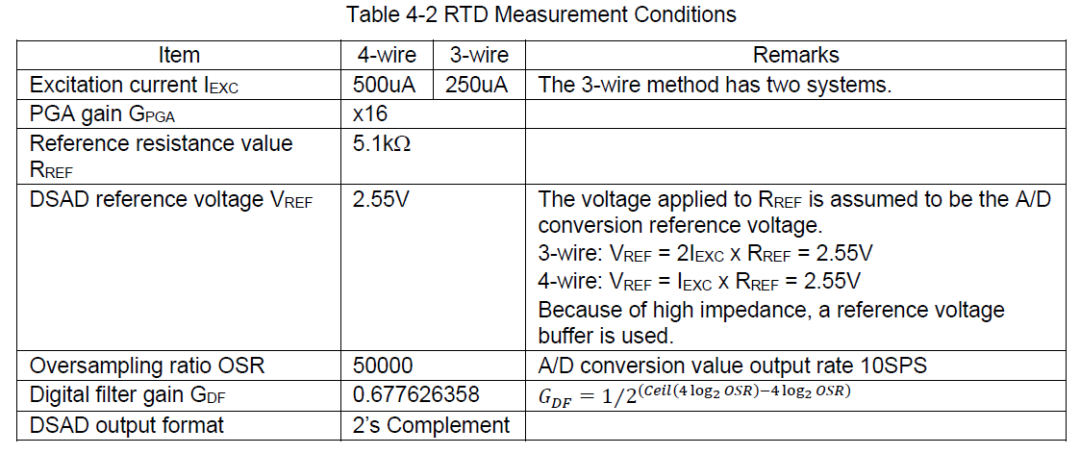
4.1 参考文档r01an4788ej0110-rx23ee-a.pdf
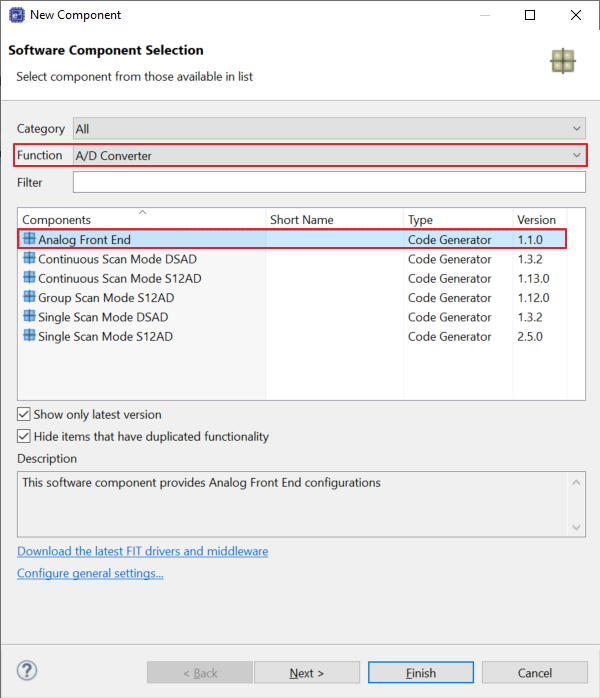
4.2 打开Smart Configurator,Components标签页点击“+”,Function选择“A/D Converter”,选择“Analog Front End”。
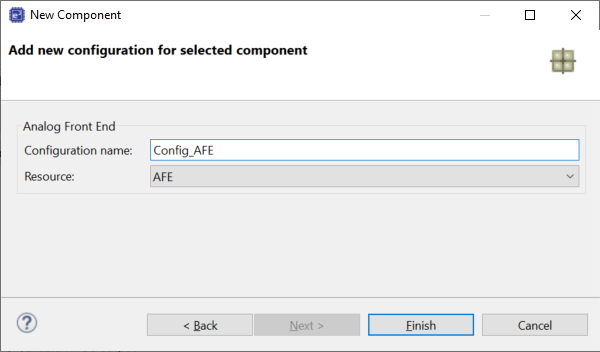
4.3 点击“Next”,点击“Finish”。
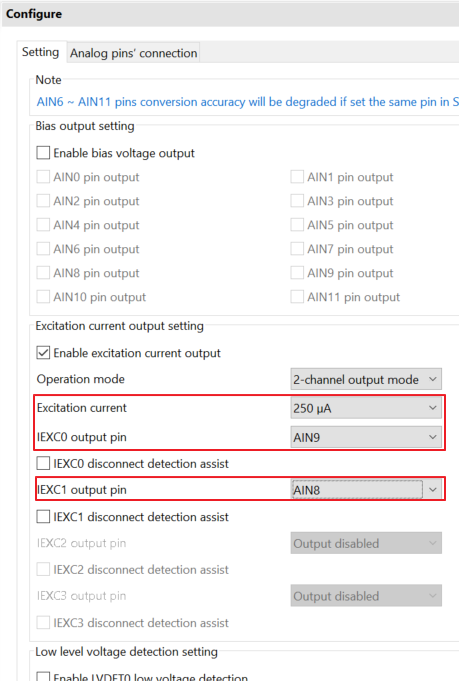
4.4 设置AFE,PT100为三线RTD(电阻温度检测器),通过电流激励能产生输出电压。
所以选择从AIN8和AIN9输出250uA的激励电流。板子上已经将J5-2连接到J4-2,J5-1连接到J4-1。
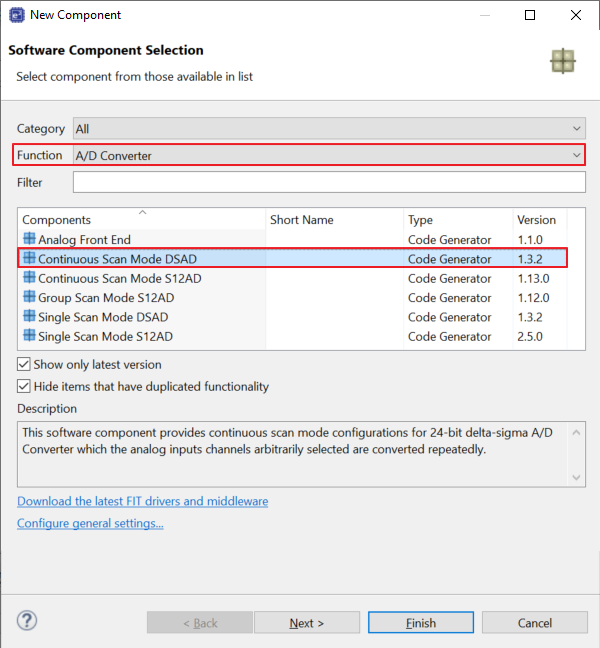
4.5 Components标签页点击“+”,Function选择“A/D Converter”,选择“Continuous Scan Mode DSAD”。
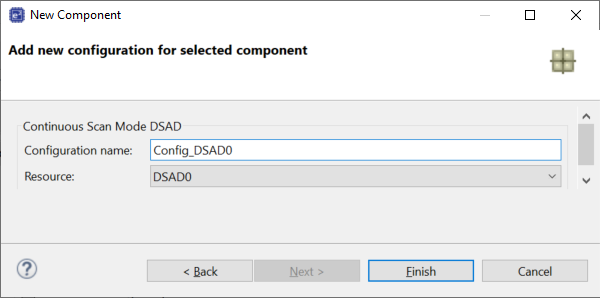
4.6 点击“Next”,点击“Finish”。
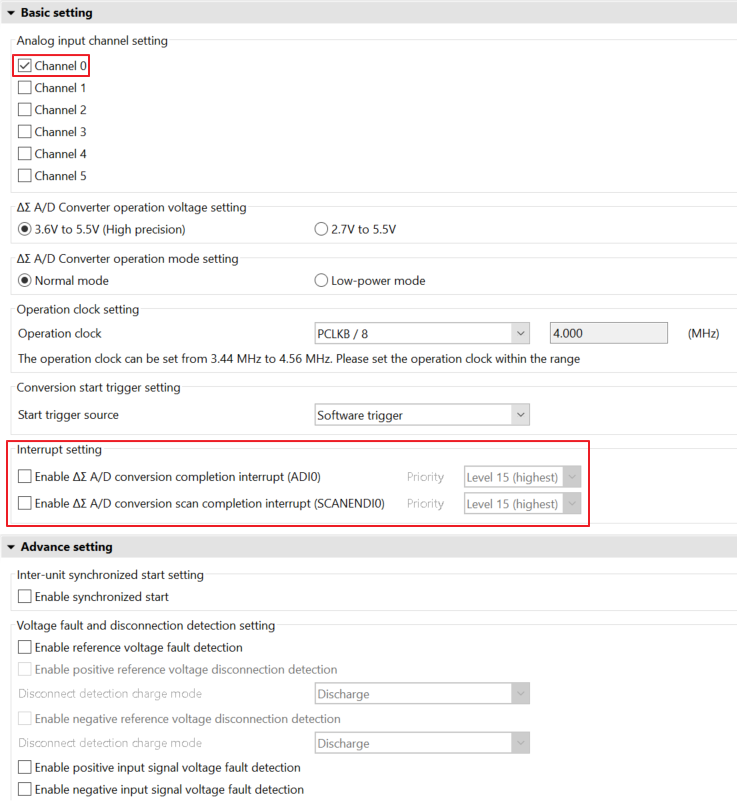
4.7 设置DSAD
选择Channel0
不勾选中断
Positive input signal选择ANI7
Negative input signal选择AIN6
Reference input选择REF1P/REF1N
勾选Positive reference voltage buffer
勾选Negative reference voltage buffer
选择PGA:x16
A/D conversion number选择Immediate value mode (the number of A/D conversions if from 1 to 255),转换次数设为1
Oversampling ratio:OSR设为50000,那么所对应的OSRm寄存器的值为3124
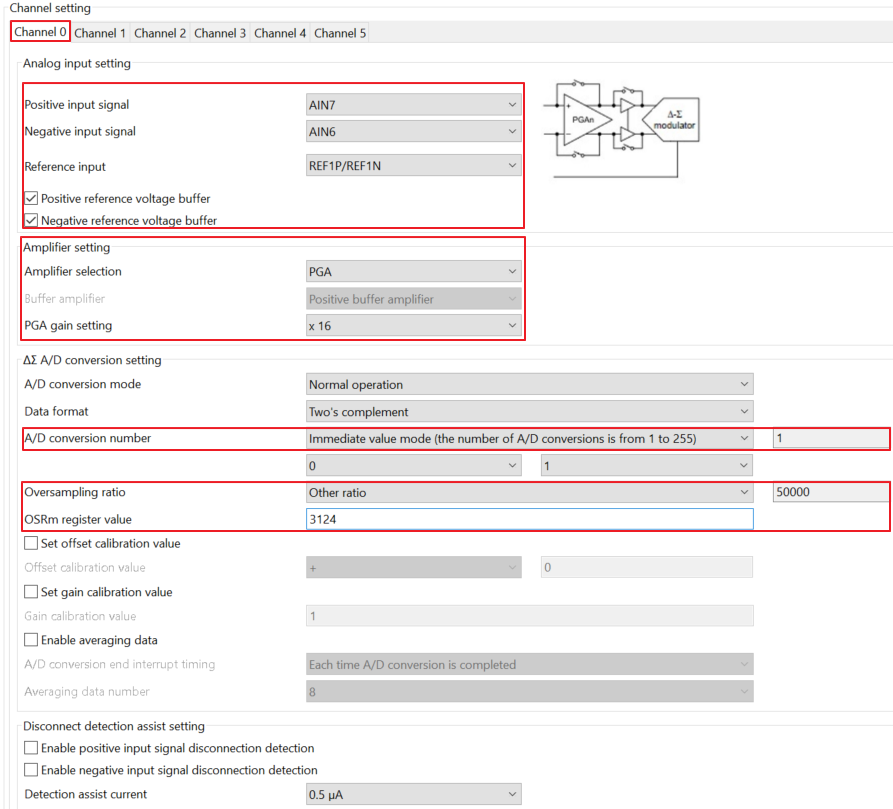
4.8 点击右上角“Generate Code”生成代码

4.9 双击src->smc_gen->Config_DSAD0文件夹中的Config_DSAD0.h
文件的最后,添加下面第2行和第3行的代码
/* Start user code for function. Do not edit comment generated here */
bool r_dsad0_IsConversionEnd (void);
void r_dsad0_ClearIrFlag (void);
/* End user code. Do not edit comment generated here */
4.10 双击src->smc_gen->Config_DSAD0文件夹中的Config_DSAD0.c
文件的最后,添加下面第2行到29行的代码
/* Start user code for adding. Do not edit comment generated here */
/**********************************************************************************************************************
 * Function Name: r_dsad0_IsConversionEnd
 * Description  : This function returns the Conversion status of DSAD0.
 * Arguments    : None
 * Return Value : bool
 *                    false:Conversion, true:Conversion end
 *********************************************************************************************************************/
bool r_dsad0_IsConversionEnd (void)
{
    return (bool) ((1U == IR(DSAD0, ADI0)) ? true : false);
}
/**********************************************************************************************************************
 End of function r_dsad0_IsConversionEnd
 *********************************************************************************************************************/


/**********************************************************************************************************************
 * Function Name: r_dsad0_ClearIrFlag
 * Description  : This function clears the IR flag
 * Arguments    : None
 * Return Value : None
 *********************************************************************************************************************/
void r_dsad0_ClearIrFlag (void)
{
    IR(DSAD0, ADI0)= 0U;
}
/**********************************************************************************************************************
 End of function r_dsad0_ClearIrFlag
 *********************************************************************************************************************/
/* End user code. Do not edit comment generated here */
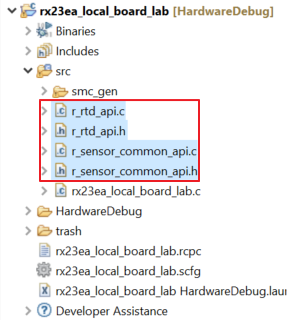
4.11 从参考例程“r01an4788_rx23ea_rtd”的src文件夹中拷贝以下文件到src文件夹中。
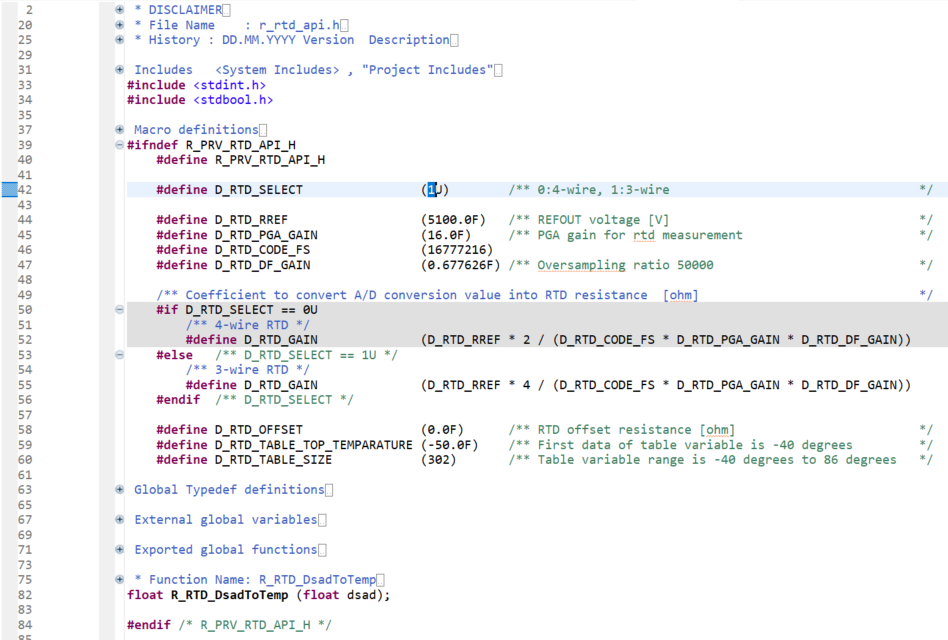
打开r_rtd_api.h文件,将D_RTD_SELECT宏定义修改为“1”(3线)。
4.12 双击rx23ea_local_board_lab.c文件,包含以下头文件(第10-12行,第16-17行)
/***********************************************************************
*
*  FILE        : rx23ea_local_board_lab.c
*  DATE        : 2023-09-16
*  DESCRIPTION : Main Program
*
*  NOTE:THIS IS A TYPICAL EXAMPLE.
*
***********************************************************************/
#include
#include
#include


#include "r_smc_entry.h"


#include "r_sensor_common_api.h"
#include "r_rtd_api.h"
4.13 在main()函数前添加变量定义(第2-3行)
bool timer_flag = false;
static volatile int32_t s_dsad0_value;                  /** DSAD0 24bit A/D value storage variable          */
static volatile float   s_temp      = 0;                /** Measurement temperature storage variable        */
4.14 在main函数中添加下面的代码(第1-2行,第6-8行,第10-44行)
  uint32_t dsad0_reg;                 /** DSAD0.DR register storage variable                          */
  float rtd_temp = 0;                             /** Measurement temperature */


  R_Config_TMR0_TMR1_Start();


    /** A/D conversion start */
    R_Config_DSAD0_Start();
    R_Config_DSAD0_Set_SoftwareTrigger();


    while (1)
    {
        if(true == timer_flag){
          timer_flag = false;


      /****************************/
      /** Temperature measurement */
      /****************************/
      /** A/D conversion complete for DSAD0? */
      if (true == r_dsad0_IsConversionEnd())
      {
              int32_t dsad0_value;        /** Signed 24-bit DSAD0 value                                   */


              r_dsad0_ClearIrFlag();      /** clear DSAD0 IR flag                                         */


              /** Get A/D value */
              {
                  R_Config_DSAD0_Get_ValueResult( &dsad0_reg);


                  /** Flag mask, Sign extension */
                  dsad0_value = (int32_t) ((dsad0_reg & 0x00FFFFFFU) << 8) >> 8;
              }
              /** Calculate the temperature [degree] of the reference junction */
              rtd_temp = R_RTD_DsadToTemp((float) dsad0_value);


              /** debug monitor */
              {
                  s_dsad0_value   = dsad0_value;
                  s_temp          = rtd_temp;
              }


      }
        }


    }
4.15 点击 编译代码。
编译代码。

4.16 高亮rx23ea_local_board_lab工程,按下调试按钮
4.17 可以通过观测变量的方式检查转换结果。
打开src文件夹中的rx23ea_local_board_lab.c文件,找到s_dsad0_value和s_temp。鼠标移动到变量名上,双击变量名,并点击鼠标右键,选择“Add Watch Expression”。
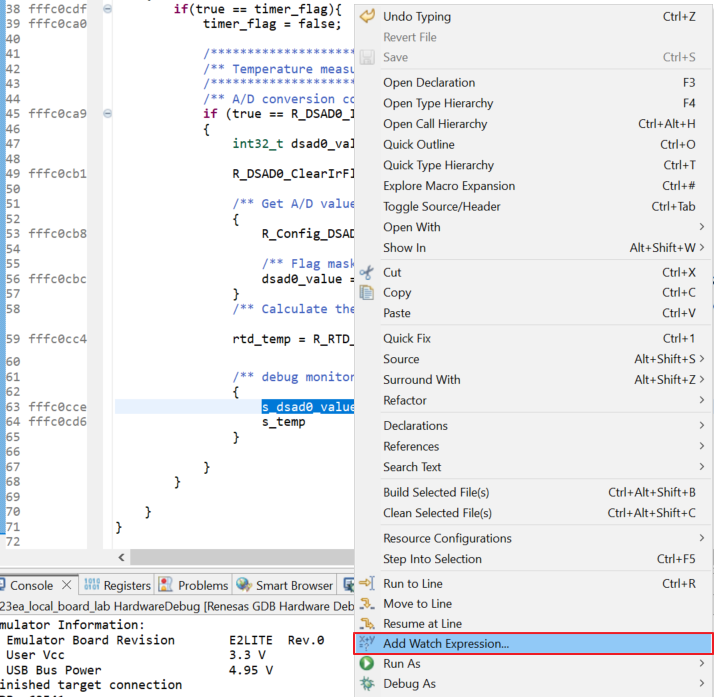
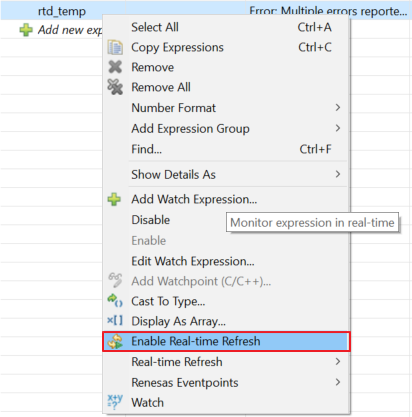
在Expressions窗口中,右键点击该变量名,选择Enable Real-time Refresh,将此变量设置为实时刷新。
4.18 运行代码 ( ),需要点击两次。
可以观察到变量的实时变化。

用手捏住传感器,可以看到数值发生变化。

4.19 按下断开按钮 或者终止按钮
 。
。
审核编辑:刘清
全部0条评论

快来发表一下你的评论吧 !
